Blender 2.5 - 2.7 tutorial to animate a cylinder

The goal of this tutorial is to describe step by step the process of skinning a simple cylinder with two joints in Blender 2.5 up to 2.7. This is a beginner lesson in the sense that I will describe as much as possible shortcuts and actions, however, there will be no high level explanations.
Note for the scholars: blender implements the heat diffusion method to compute skinning weights, linear blending and dual quaternion skinning are used to deform the mesh.
Basics
In this section I wlll describe basic object selection and camera operations, if you are already familiar with these features you can skip this section. Let's start by opening blender, you should see a splash screen:

The splash image changes according to blender's version, just left-click ![]() on it to make it disappear. You should see the default scene with objects already present in your viewport:
on it to make it disappear. You should see the default scene with objects already present in your viewport:

The window displaying the 3D scene is called the viewport. In this viewport, from left to right you have: a camera, a cube (in grey) and a light. The cube is outlined in orange to show you it's selected, right-click ![]() to select any object, for instance the light:
to select any object, for instance the light:

So, most people are used to select with a left-click ![]() , however, here we use the opposite click, you will see in a few seconds why. Moving objects is also a bit unintuitive: start by selecting an object by right-clicking
, however, here we use the opposite click, you will see in a few seconds why. Moving objects is also a bit unintuitive: start by selecting an object by right-clicking ![]() then maintain your right-click and start moving your mouse. Once the object starts moving you don't have to maintain right-click.
then maintain your right-click and start moving your mouse. Once the object starts moving you don't have to maintain right-click.
Here is why we select and move objects with a right-click ![]() instead of left-clicking: if you right-click
instead of left-clicking: if you right-click ![]() again while moving your object goes back to its original position! This is an integrated CTRL+Z you don't have to hit the keyboard to undo something, instead just right-click. To maintain the object to its new position use the left-click
again while moving your object goes back to its original position! This is an integrated CTRL+Z you don't have to hit the keyboard to undo something, instead just right-click. To maintain the object to its new position use the left-click ![]() . Very cumbersome at first I know, but you will learn to love it.
. Very cumbersome at first I know, but you will learn to love it.
Here are some other shortcuts:
- DEL deletes objects
- SHIFT +
 selects multiple objects
 - G translates ( to undo
 fix position). Similarly: R rotates and S scales
You can also use manipulators to transform an object:
![]()
Click on the small blue icons to change to translation ![]() , rotation
, rotation ![]() , scale
, scale ![]() or no manipulator
or no manipulator ![]() . You can also hit CTRL+SPACE to toggle its display. To move an object left-click
. You can also hit CTRL+SPACE to toggle its display. To move an object left-click ![]() on the manipulator's axis.
on the manipulator's axis.
Ok here are some shortcuts to move the camera I'll let you explore them:
 (wheel) zoom in/out
- (click) rotates around a invisible pivot (scene's by default)
- SHIFT + translate the camera and its pivot point.
The pivot point is an invisible point used as a center of rotation for the camera. - . set the camera's pivot to the selected object (or face, vertex, anything selected).
One of the most useful shortcut, select different objects and try it! - 1 or 3 or 7 toggles front, right or top views. If CTRL is maintained then back, left or bottom views are toggled instead.
- 5 switch from ortho to perspective projection
Skinning
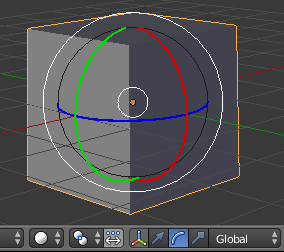
Here is what we are going to do: create a cylinder and an armature (i.e. a skeleton) then bind the armature to the cylinder. Delete the cube and go to the orthogonal view 5 on the right side 3:
![]()
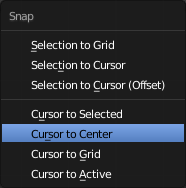
If the red cursor (looking like a life-belt) is not in the middle put your mouse over the viewport and press SHIFT + S then click Cursor to Center:
This circle is called the 3d cursor, one of its purpose is to define where objects are created. You can move it with a left-click ![]() . Now, hover the viewport with your mouse and strike SHIFT + A to spawn the creation menu:
. Now, hover the viewport with your mouse and strike SHIFT + A to spawn the creation menu:
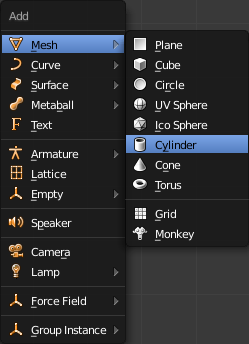
You should see this:
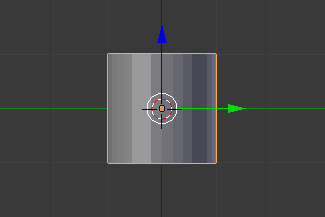
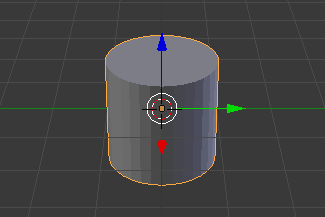
The second image is the perspective view (strike 5 then 8 twice). Ok, go back to the orthogonal right view (5 then 3). Look at the bottom of the viewport window and you should see a menu list with  :
:

Each type of objects has a different list of modes. For instance, meshes can be edited, sculpted or even painted. Go to the  (either unroll the menu or hit TAB):
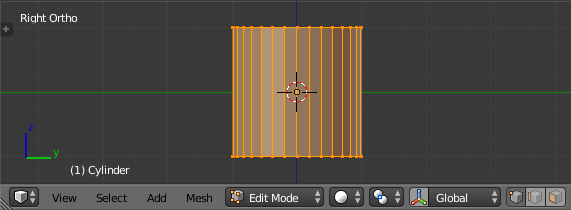
You can see the vertices of the cylinder are only distributed on the top and bottom of the cylinder. We need more vertices in the middle to get a smooth deformation when applying skinning. Let's subdivide it using the Loop cut and slide tool. Put your cursor over the cylinder and hit CTRL+R. A purple cut should appear. Scroll-up ![]() and multiple cuts appear:
and multiple cuts appear:
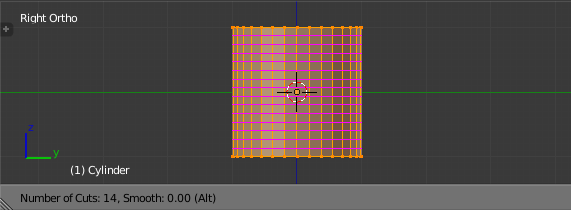
To permanently create these edge-loops left-click ![]() then place them in the middle with a right-click
then place them in the middle with a right-click ![]() :
:

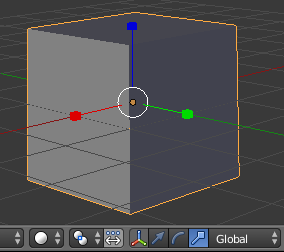
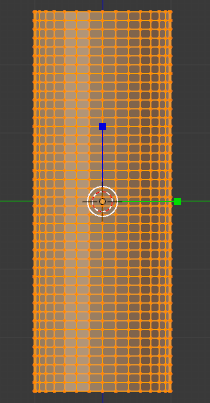
We are going to make the cylinder taller. Select every vertices by hitting A twice. Display the manipulator CTRL+SPACE and choose scale ![]() to scale up our cylinder by grabbing the blue axis:
to scale up our cylinder by grabbing the blue axis:
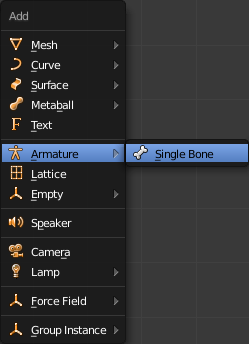
To deform this cylinder we need to create a skeleton (also called armature in blender). Exit the by hitting TAB you should be in . To create the armature, go to the creation menu (SHIFT+A) and add a single bone.
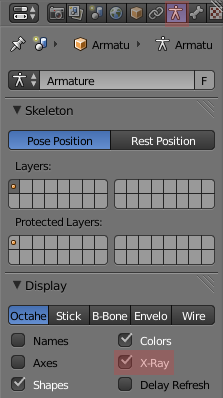
If the 3D cursor is in inside the cylinder, you should not see anything because your newly created bone will be placed inside as well. It is not very handy. You can tell blender to draw the skeleton on top of any other objects. Provided that the skeleton is selected, you should see in the right panel a 'tab' with ![]() . Click on it and search for the check box
. Click on it and search for the check box X-ray:
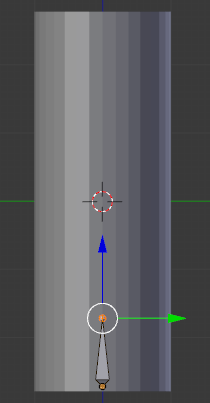
You should see the bone on top of the cylinder (although its coordinates are unchanged). Go to with TAB and select the extremities of the bones to place it in the lower part of the cylinder.
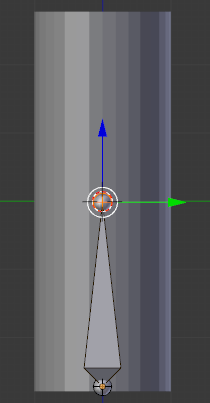
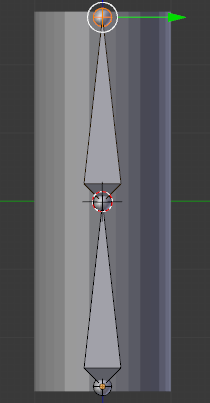
Finally, select the top extremity and extrude it: hit E and move your mouse, then left-click ![]() to fix the position of the new joint:
to fix the position of the new joint:
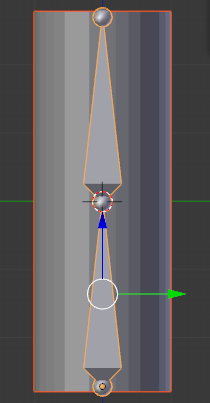
Marvelous! we have an armature and a mesh we only need to link the two together. Blender like many 3D modellers stores its objects into a tree hierarchy called the scene tree. To link the armature to the mesh we need to make the armature the parent of the mesh. If you don't understand just follow the instructions: go back to and select both the cylinder then the armature (use SHIFT+![]() ). In order to parent the objects together hit CTRL+P a menu will ask you how to link them (i.e. what kind of skinning weights to create):
). In order to parent the objects together hit CTRL+P a menu will ask you how to link them (i.e. what kind of skinning weights to create):
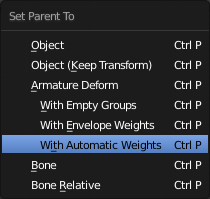
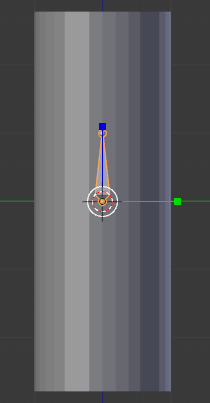
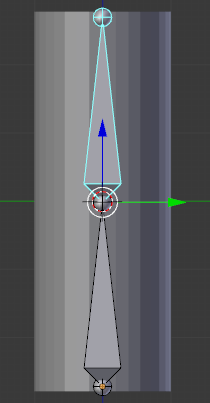
Choose With Automatic Weights, it's the best method. It is worth noting Blender uses the heat diffusion method inspired from the paper "Automatic Rigging and Animation of 3D Characters" by Ilya Baran & Jovan Popović. To check if the cylinder was bound correctly to the mesh, go to  with CTRL+TAB then select a bone. In this mode a selected bone appears in blue:
You should be able to rotate it with the manipulator. By default Blender uses Linear Blending Skinning. You can change it to Dual Quaternion Skinning. Select the mesh then access its modifier stack located on the right-side menu if you click on the wrench ![]() :
:
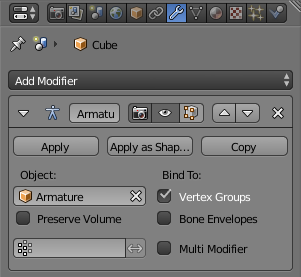
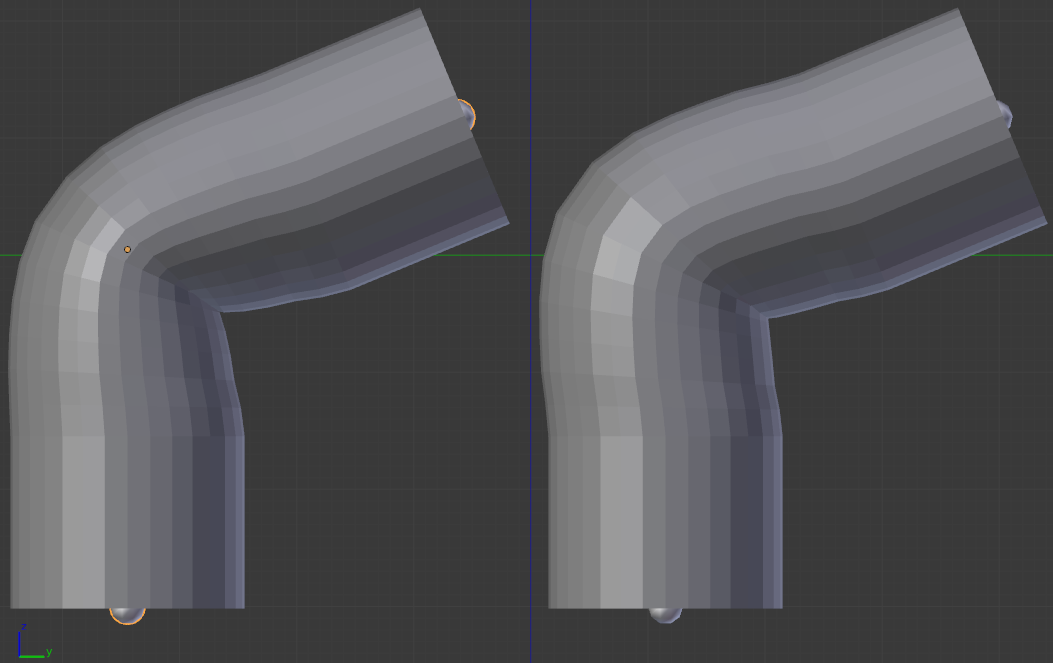
This menu shows a stack of modifiers deforming the selected mesh. You should only see one modifier: the armature modifier . If you check the Preserve Volume box it will switch the skinning algorithm to Dual Quaternions Skinning! Here are the results (left Linear Blending and right Dual Quaternions):
 Donate
One comment
Just to see if my Spam bot question is correct.
curious - 27/11/2016 -- 16:42